Get started with Discogs Lightspeed POS Integration
Welcome to DisConnect. In this guide, we will be looking at configuring your Discogs Lightspeed Integration where the products will be syncing in the direction from Discogs to Lightspeed.
Let me walk you through the whole sequence of steps that you need to follow to quickly & effectively set up DisConnect.
Step 1: You can use the below URL for registration.
Registration URL: https://disconnect.constacloud.com/register
Step 2: Registration Process consists of two steps.
Firstly, you need to fill in the below-mentioned details.
- Name
- Password: It should have a minimum of 8 characters with 1 Capital, 1 Numeric, 1 special character.
Step 3: After entering all the required details, you need to click on the “Create Account” button.

Step 4: Upon creating an account inside DisConnect, you will see the following pop-up appear on the web app. It’s a sequence of quick guided onboarding steps that you can perform in order to sync between Discogs and your other channels or you can skip it to manually configure your sync using all the advanced features.
The Quick Guided Onboarding
Step 4.1.1: In the first step, Connect your Discogs Account. Upon clicking the “Connect your Discogs account” button, you will be redirected to your Discogs Account.

Once you click on the Authorize button, your Discogs account will now be authenticated to DisConnect.

Step 4.1.2: In the next step, we will be authenticating your Lightspeed account. To do that, click on Authenticate.

Step 4.1.3: In the third step, a login page will open, there you can add your username and password of lightspeed, and then click on login.
It will ask for Authorization, click on the button and you are done.

You can choose to sync products from Lightspeed to Discogs by ensuring your products are in a particular category or have a particular tag. Once you’ve selected either “Category” or “Tag”, enter the values of the categories or Tags of the products you wish to sync to Lightspeed POS.
It is mandatory to have the Discogs Release ID in one of your Lightspeed fields eg: SKU. So select the field where your Release ID is & then start the sync.
Note: For future products, you can simply add them to the categories/tags that you put on the screen on Lightspeed & DisConnect will automatically sync them over to Discogs.
Step 4.1.4: Once you click on the “Save & Start Sync” option, you will get this following up

The Detailed Complete Setup
Step 4.2.1: If you select “Skip guided setup” in 4.1.1, you will see the below screen.

To get started with importing your products to DisConnect from your connected platforms, please go to the “Discogs” tab of your channel settings.

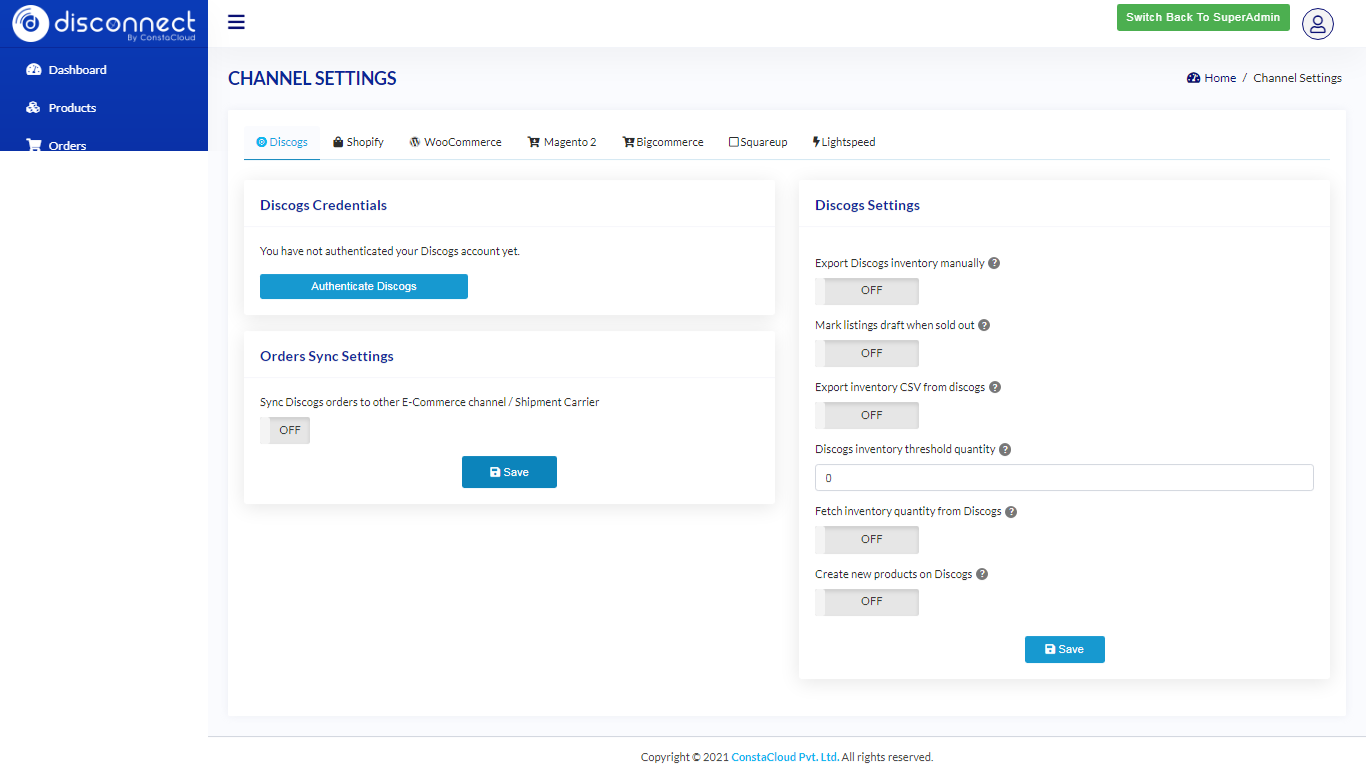
Step 4.2.2: In the Discogs channel settings, you will find various sections which include:
- Discogs Credentials:
In order to Authenticate your Discogs account to DisConnect, you can click on authenticate button, and it will redirect you to the Discogs Login page, where you can authorize the DisConnect app. - Discogs Settings:
You will find the options to fetch inventory of products on Discogs. Learn more about Inventory Management & Auto Relisting here. - Order Sync Settings:
DisConnect allows you to sync your orders from Discogs to other e-commerce channels. To set this up,- Select the Channel that you want your orders to sync to. Please do note all your connected channels will be displayed here.
- Select the “Status” of the Discogs orders to sync. You can select one from the various options available to you.
- Please remember to click on the “Save” buttons corresponding to each section for your changes to take effect.
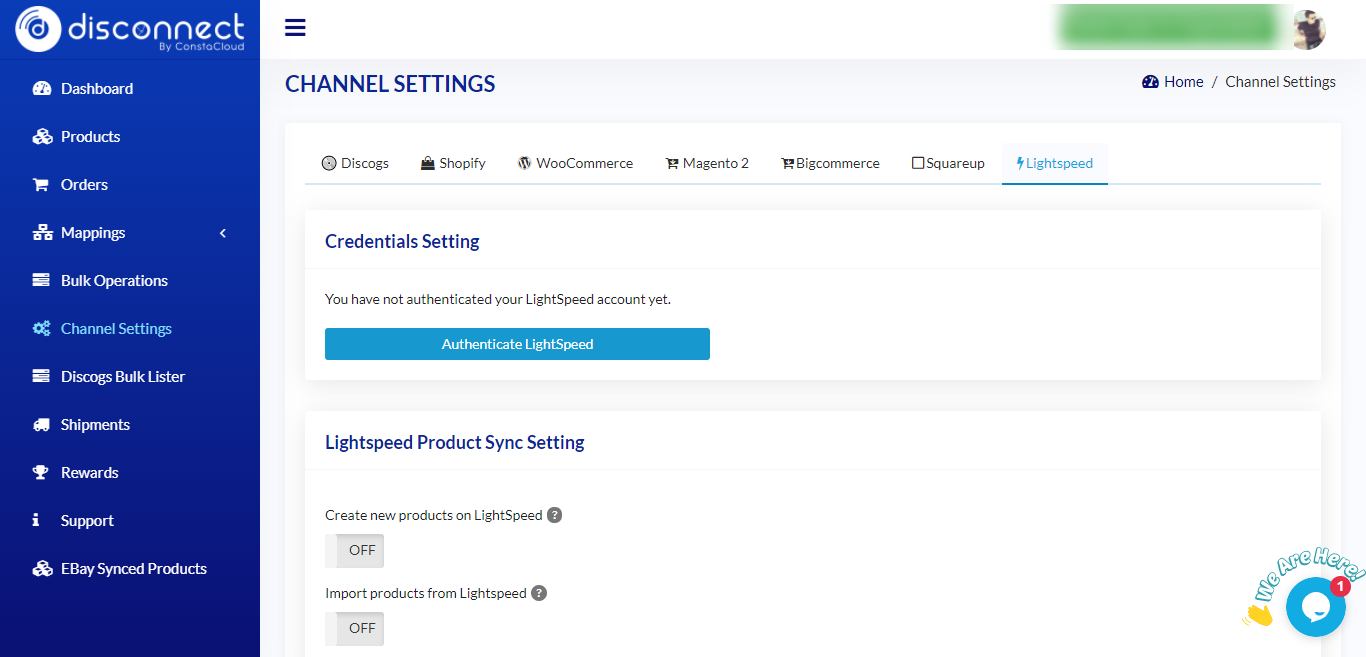
Step 4.2.3: As you have LightSpeed as your online e-commerce platform, click on the LightSpeed tab from the header in order to complete your relevant configurations.

Dashboard Functionality
LightSpeed Credentials:
In order to connect your LightSpeed account to DisConnect, you can click on authenticate button, and it will redirect you to the Lightspeed Login page, where you can authorize the DisConnect app.

There are two major sections here which include the Creation of Products on LightSpeed & the option to Import products from LightSpeed.
Create new products on LightSpeed
In order to sync your products from Discogs to LightSpeed, you’ll have to set up all the relevant settings in the Discogs channel settings tab as seen earlier. Please do note that we will use the preconfigured field mapping template by default. However, should you wish to customize the Field mapping & Category mapping to suit your needs, you’re welcome to do so. In a nutshell, Field Mapping helps you dynamically map your Discogs data to your LightSpeed fields & category mapping helps you create your Discogs product listings into its respective LightSpeed collections.
Once all the settings are done, switch ON the create new products on the LightSpeed toggle option. In doing so, you’ll be opened out to more options to configure. They include –
Sync Draft listings to LightSpeed –
In addition to syncing products that are “For Sale” from Discogs to Lightspeed POS, we also have the option to sync listings that are on “Draft” status on Discogs. You can achieve this by enabling this option.
Repricing feature
The repricing feature is used to reprice the products in your online retail stores. If you want to increase or decrease the price of your product in your online retail store compared to the original price in Discogs then you can use this feature. To know more about it, click here.
Once all your settings are completed, click on update & the sync will begin.
Import products to Discogs from Lightspeed POS
Should you wish to sync products from Lightspeed POS to Discogs, switch “ON” import products from Lightspeed and configure the settings based on your needs accordingly. Here’s a detailed guide to do 2-way product sync from Lightspeed POS to Discogs.
Generic DisConnect features for Advanced Users
In addition to all the features you’ve already seen, DisConnect brings you a lot of advanced features which helps you completely customize your selling experience to bring you the highest possible conversions
Features include Bulk updating Prices & Comments, Updating a common or additional image to multiple or single images respectively, Updating Release IDs, Changing Inventory levels across platforms and choosing which products sync or not, etc. To learn more in detail check out our guide here.
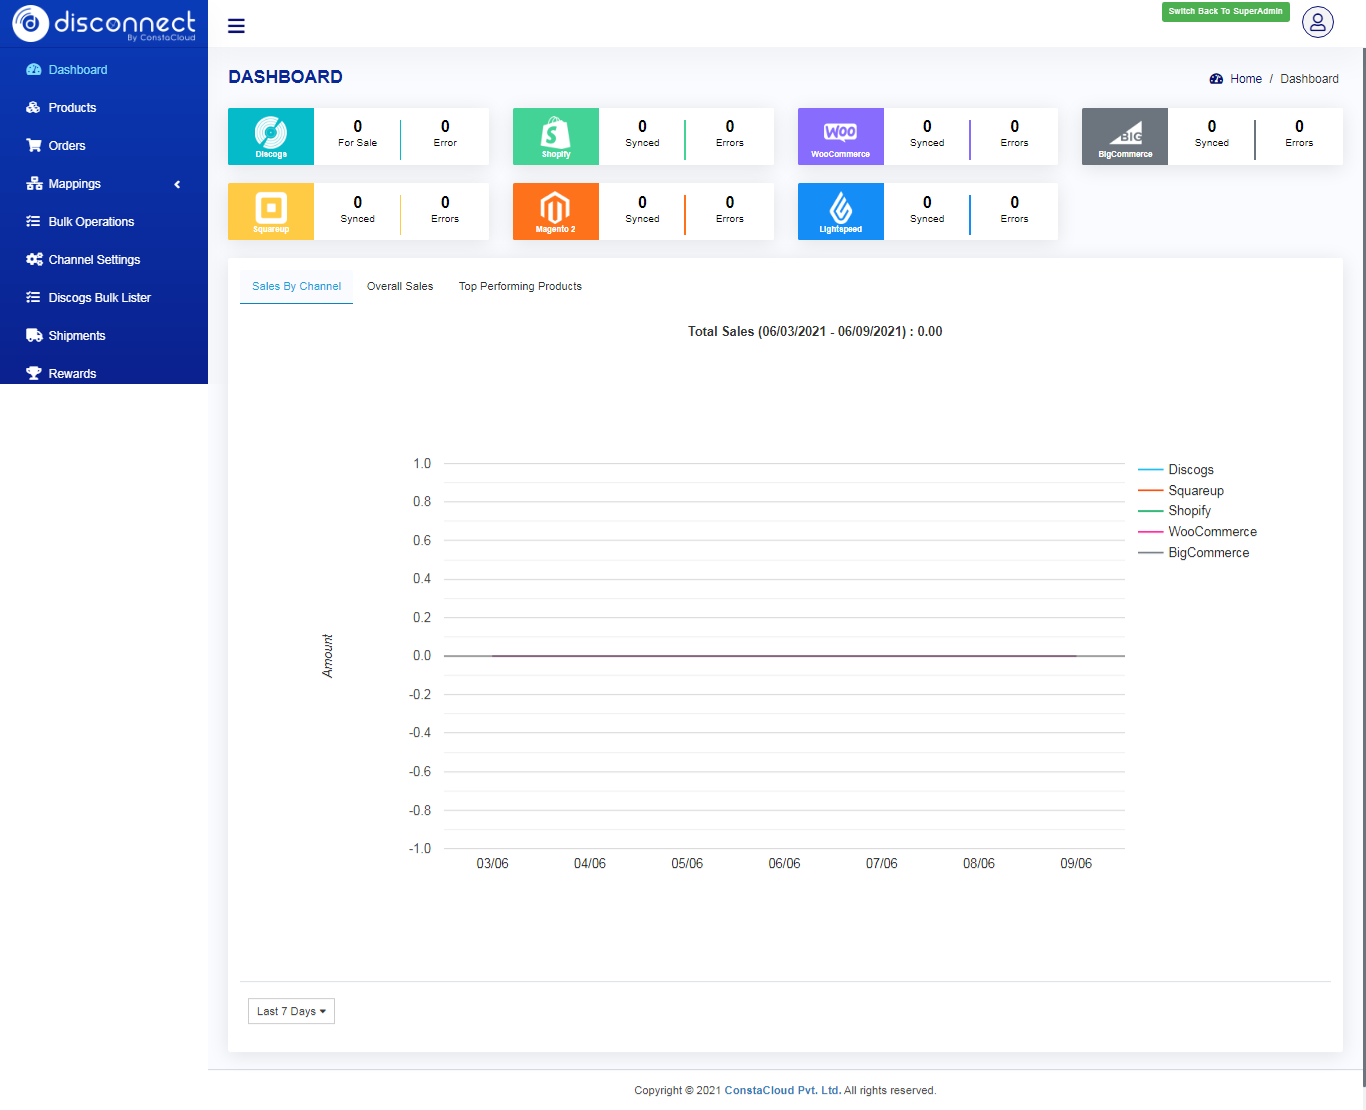
The dashboard will show a summary of your products. If you have Lightspeed POS as your retail store then you will see Discogs Products on sale, Lightspeed POS products synced, Lightspeed POS products with an error, and also all other product details.
The intuitive dashboard also portrays your sales by channel, overall sales & even your top-performing products. Monitor & forecast the number of products & orders you have & sell on each platform over time and plan your supplies & stock inventory accordingly
Password Settings:
To Change Password: User has to click on the “Change Password” button and they have to fill out the required details like an old password, new password and confirm the password.

This is the process to get started in the DisConnect app. It helps to integrate your Discogs products with your online retail store where you can manage your inventory and orders with just a few clicks. If you have any query then you can contact us at help@disconnect-app.com

